Migrate a Rocky Linux KVM Virtual Machine to Azure
Introduction
This article provides guidance on migrating a Rocky Linux virtual machine created locally using KVM to Azure.
Follow these steps to ensure a smooth migration from your local Rocky Linux KVM-generated VM to Azure.
Problem
You need to migrate a Rocky Linux virtual machine created in a local KVM environment over to Azure.
Symptoms
You have a Rocky Linux VM running locally on KVM and require it to run in Azure.
Resolution
Prerequisites
KVM
-
Rocky Linux host with at least a 500GB disk, 32GB of RAM, and 16 vCPUs available.
-
libvirtinstalled (please see Setting up libvirt on Rocky Linux on how to installlibvirton Rocky Linux. -
Rocky Linux DVD ISO.
Azure
-
Azure subscription.
-
Azure Recovery Services vault.
-
Azure Virtual Network.
Steps to Resolution
Azure step 1
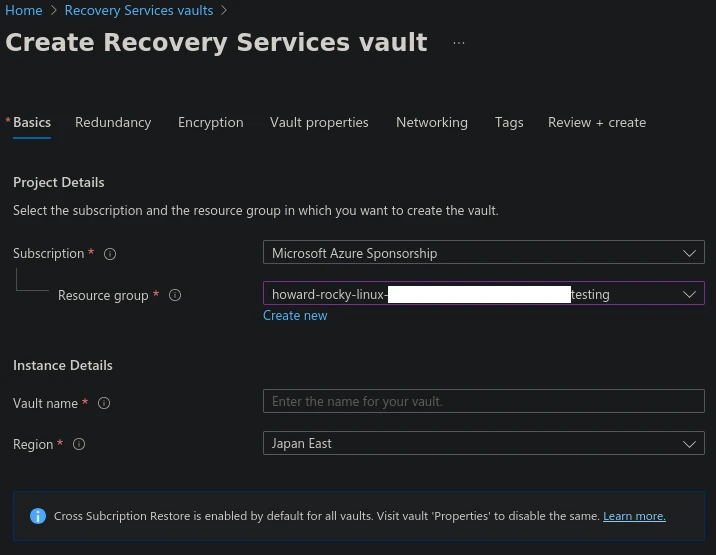
In Azure, navigate to Recovery Services vaults and create a new vault under your Resource Group:
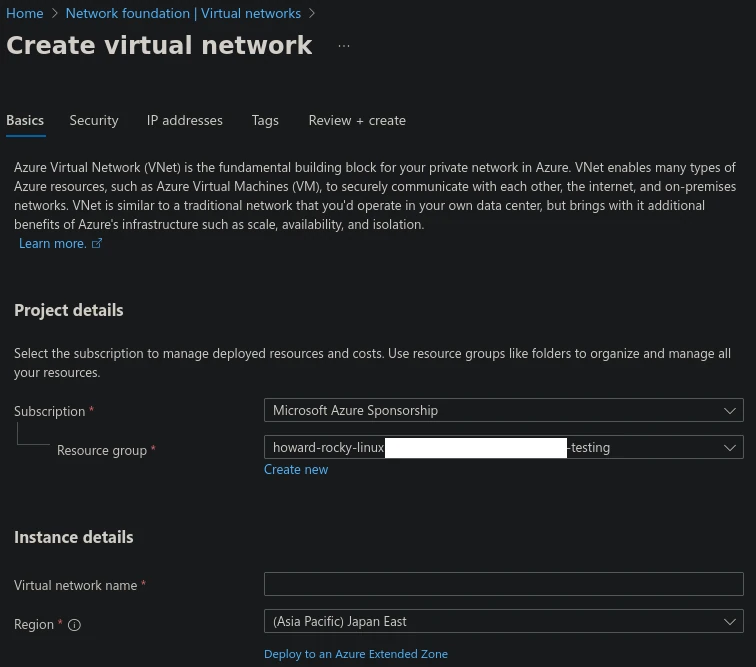
Then navigate to Virtual networks, select Create, and select your Resource Group and your Region.
Under your Recovery Services vault, select Enable Site Recovery, then VMware machines to Azure, and after that click 1: Prepare Infrastructure.
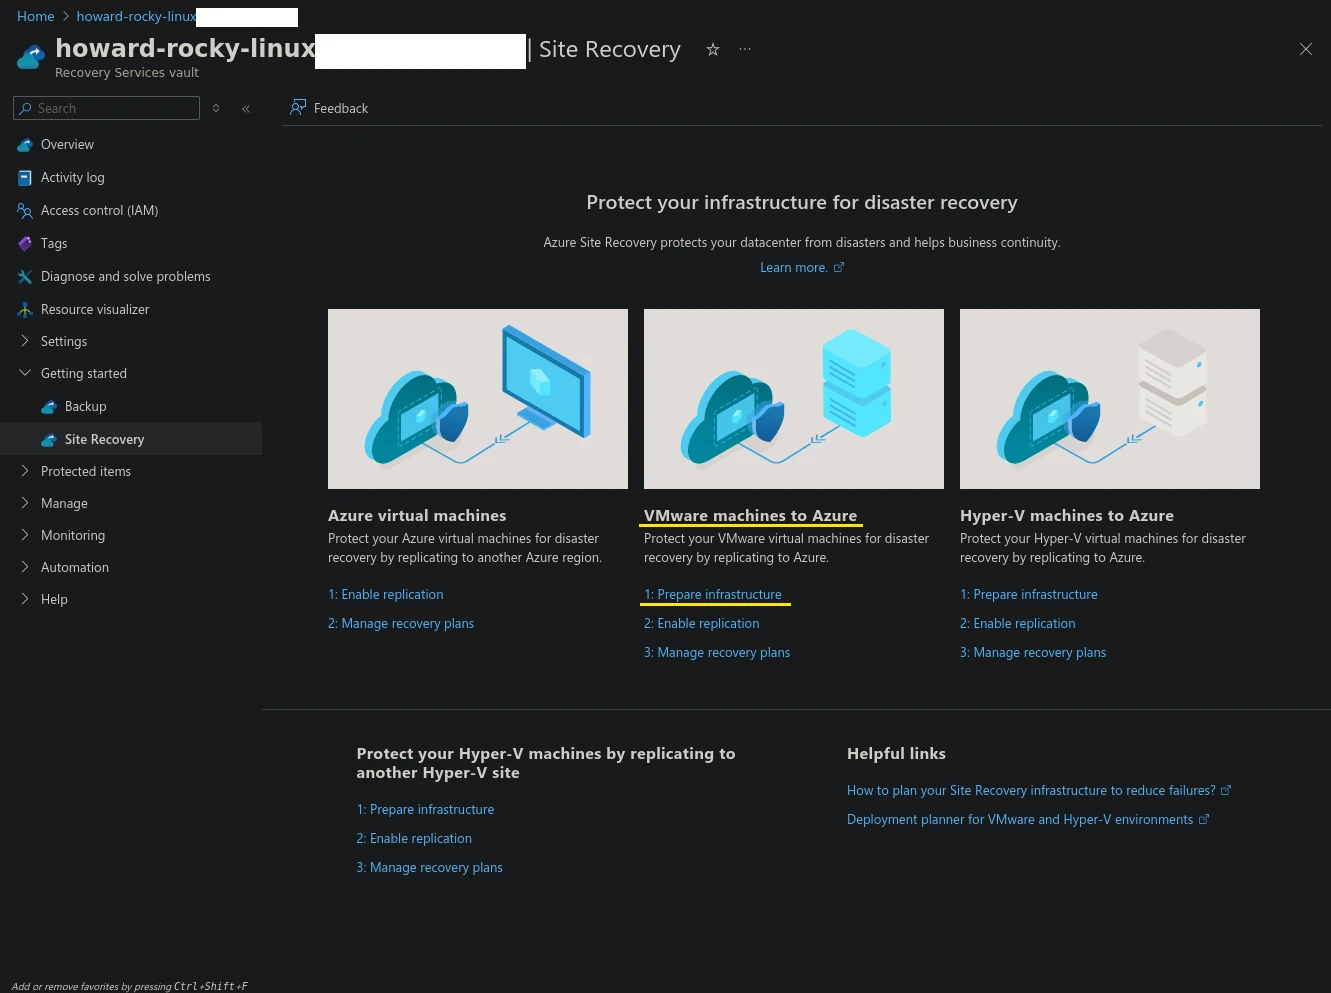
- Download the
.OVAimage from Azure to your local machine.
KVM steps
Set up a new Rocky Linux VM on KVM. Assign it a 16GB disk, at least 2 vCPUs, and a minimum of 4096 MB RAM. virt-manager is the recommended option.
Before initiating the installation of Rocky Linux, under Hardware settings, change the Disk bus for device VirtIO Disk 1 from VirtIO to SCSI. This is needed in order for the disk to boot on Azure once the VM is migrated over.
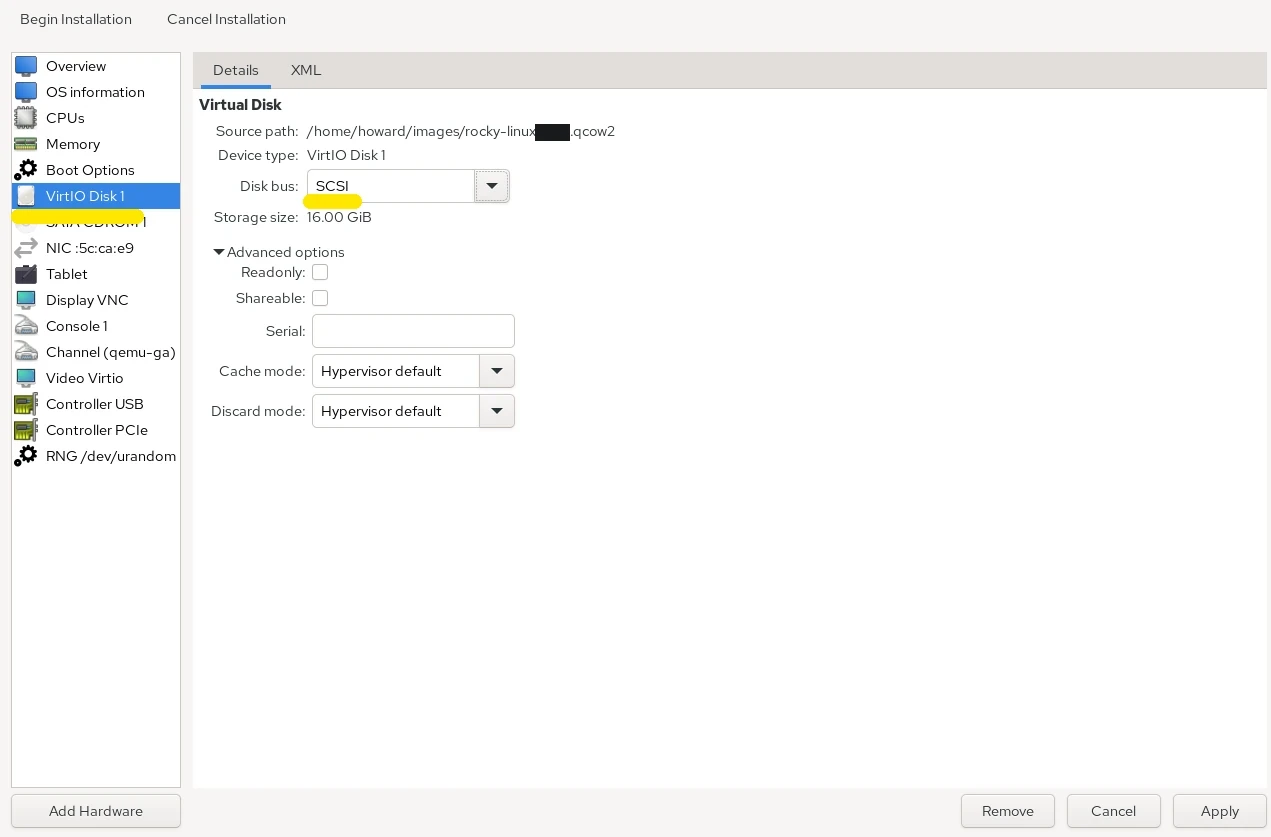
Apply the changes and install Rocky Linux.
Ensure all necessary firewall ports are open:
sudo firewall-cmd --add-port=443/tcp --permanent
sudo firewall-cmd --add-port=1024-65535/tcp --permanent
sudo firewall-cmd --add-port=135/tcp --permanent
sudo firewall-cmd --add-port=443/udp --permanent
sudo firewall-cmd --reload
After installing Rocky Linux, shut down the VM and remove the SATA CDROM 1 from VM's hardware list.
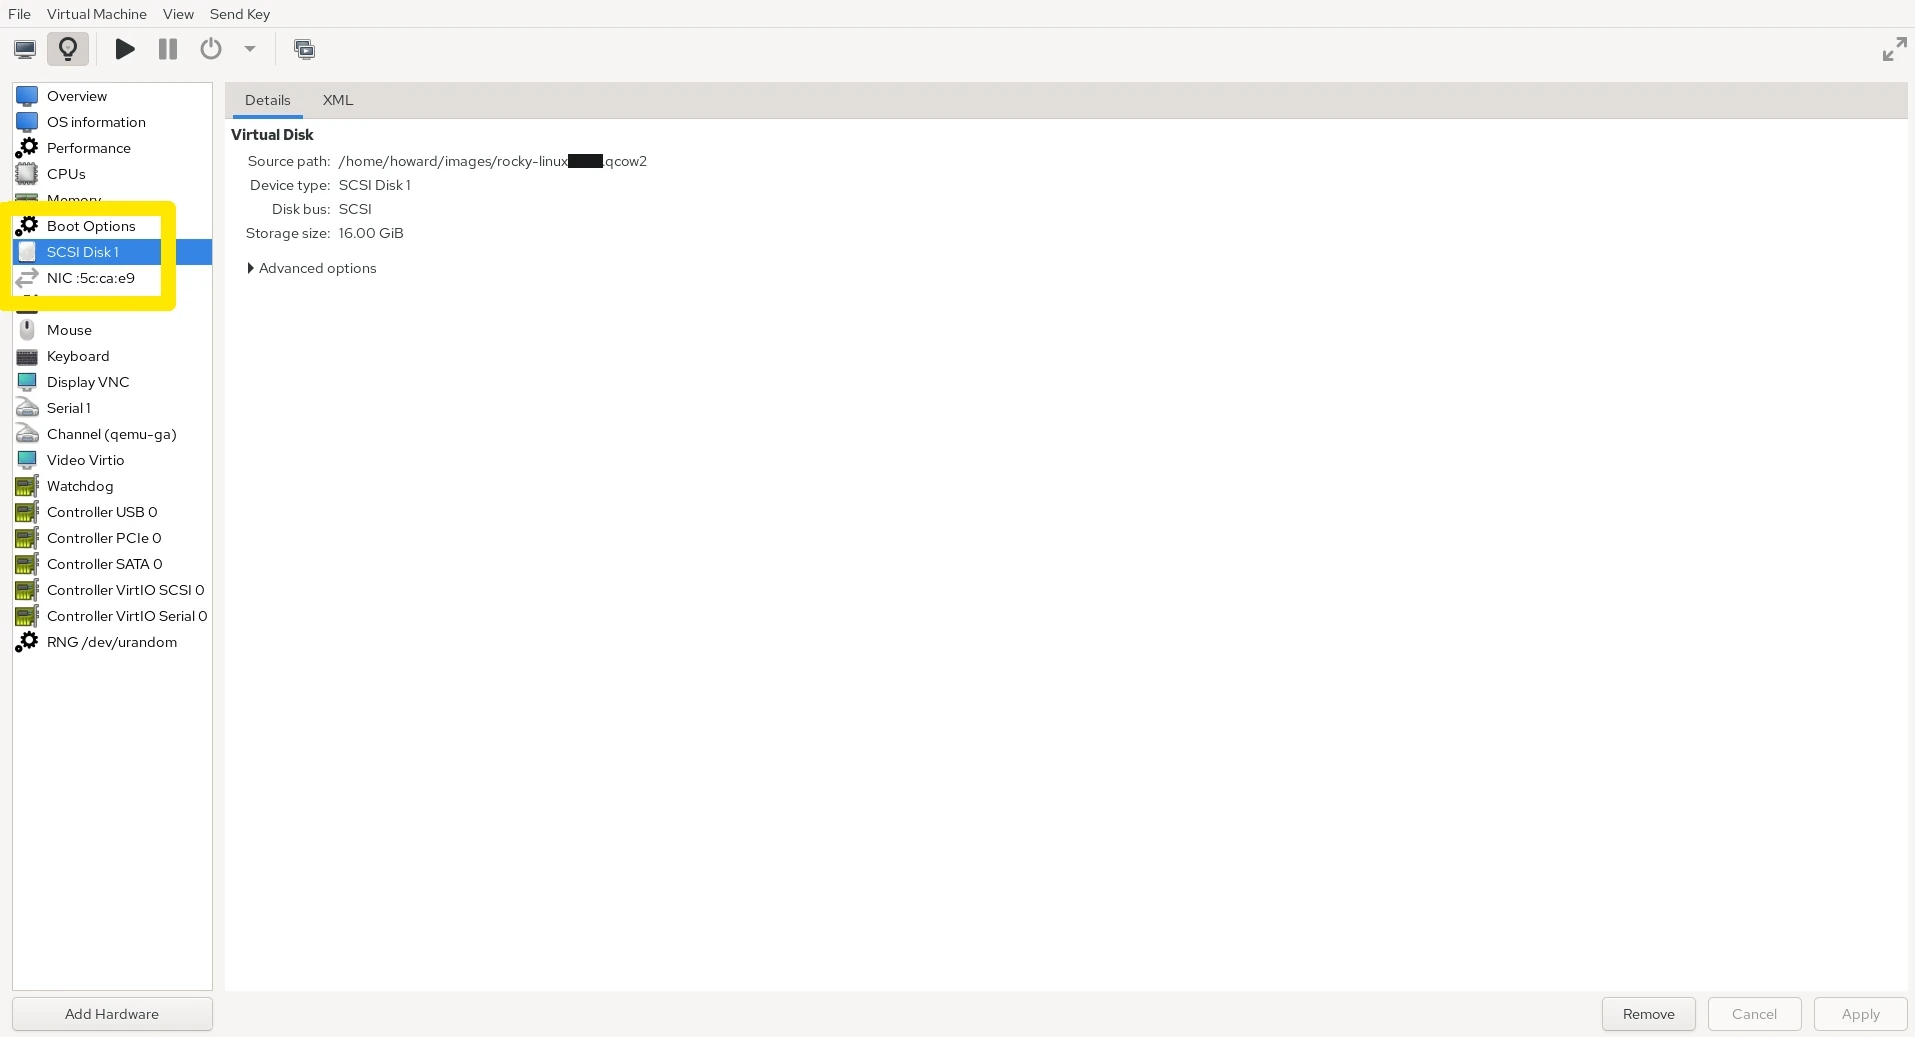
In the VM's hardware list, select the XML tab (you need to enable XML editing in virt-manager beforehand) and modify the XML configuration of the SCSI Disk 1 exactly as in the following:
<disk type="file" device="disk">
  <driver name="qemu" type="qcow2"/>
  <source file="/PATH/TO/<YOUR_QCOW2_IMAGE>.qcow2"/>
  <target dev="sda" bus="scsi"/>
  <address type="drive" controller="0" bus="0" target="0" unit="0"/>
</disk>
Power up the VM and verify it boots successfully.
Azure Site Recovery VM steps
Extract the required vmdk image files from the .ova image that you downloaded earlier in the Azure steps:
tar -xvf ./MicrosoftDRAppliance.ova
Convert the extracted .vmdk images to .qcow2:
qemu-img convert -O qcow2 MicrosoftDRAppliance_disk0.vmdk MicrosoftDRAppliance_disk0.qcow2
qemu-img convert -O qcow2 MicrosoftDRAppliance_disk1.vmdk MicrosoftDRAppliance_disk1.qcow2
Create a new VM in virt-manager using the MicrosoftDRAppliance_disk0.qcow2 image, set the OS as Windows Server 2016, provision the VM with a minimum of 16GB RAM, 8 vCPUs, and 200GB storage.
Before starting the VM, attach the MicrosoftDRAppliance_disk1.qcow2 image as a separate disk.
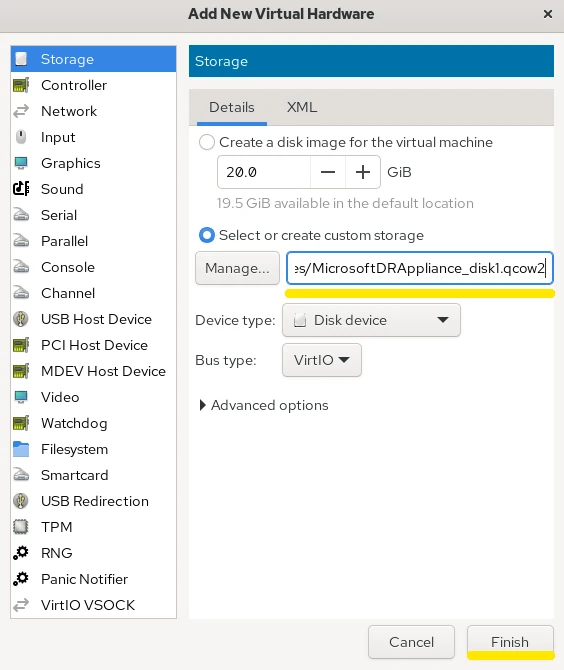
Boot the VM and complete the initial setup, sign-in to Azure and provide your Registration key that you received from the 1: Prepare Infrastructure step in Azure.
Under Configure vCenter details and Provide physical server details, make sure you select the options for a Physical server being migrated and provide the root login credentials and IP address for your local Rocky Linux VM.
The process will take about 30 minutes to complete, with a green checkmark shown at the end if it was successful or not.
Azure step 2
In Azure Portal, navigate to Recovery Services vault, then Site Recovery, after that VMware machines to Azure and then Enable replication.
Under Machine type, select Physical machines, choose your Rocky Linux VM and click Next.
Under Source settings, leave everything as default, and set a Target name for your Rocky Linux VM. An example is rocky-linux-kvm-vm. Once done, click Next.
Under Target properties, select your Failover Azure network and Cache storage account, keep everything else as default, and click Next.
Click Enable replication.
Check the replication status under Replicated items in your Recovery Services vault.
Once the status of Enabling protection has gone, you can then initiate a Test Failover.
Once replication completes, initiate a Test Failover.
After successful testing, verify the VM is available and running under Virtual machines in Azure.
Select Cleanup test failover under Replicated items to remove the VM that was generated.
Power down your local KVM Rocky Linux VM.
Under Replicated items, choose Failover.
Once the Failover is complete, go back to your Replicated items page and click Complete Migration.
If the new Virtual Machine in Azure is working as expected, then press OK and Azure will then cleanup all of the configurations and settings that were generated during the Migration process.
Your local KVM VM is now up and working on Azure!
Root cause
Migration of a KVM-based Rocky Linux VM to Azure requires specific configurations, including correct disk types (SCSI), appropriate firewall configurations, and usage of the Azure Site Recovery Appliance for replication and failover.
Notes
Ensure proper firewall and disk configuration before migration to prevent connectivity and boot issues.
Always validate the VM in Azure using the test failover feature before committing to a full failover.